Here's the next tutorial for those of you that couldn't make it to class today, you have everything provided in your kit to complete this layout. Any questions, don't hesitate to contact me at the Gallery for help.
Take the piece of dark brown card and cut lengthwise to create a 2 inch strip and a 3 inch strip.
Stick the 3 inch strip to the top of the striped 12x12 and stick the 2 inch strip about half an inch up from the bottom of the page.
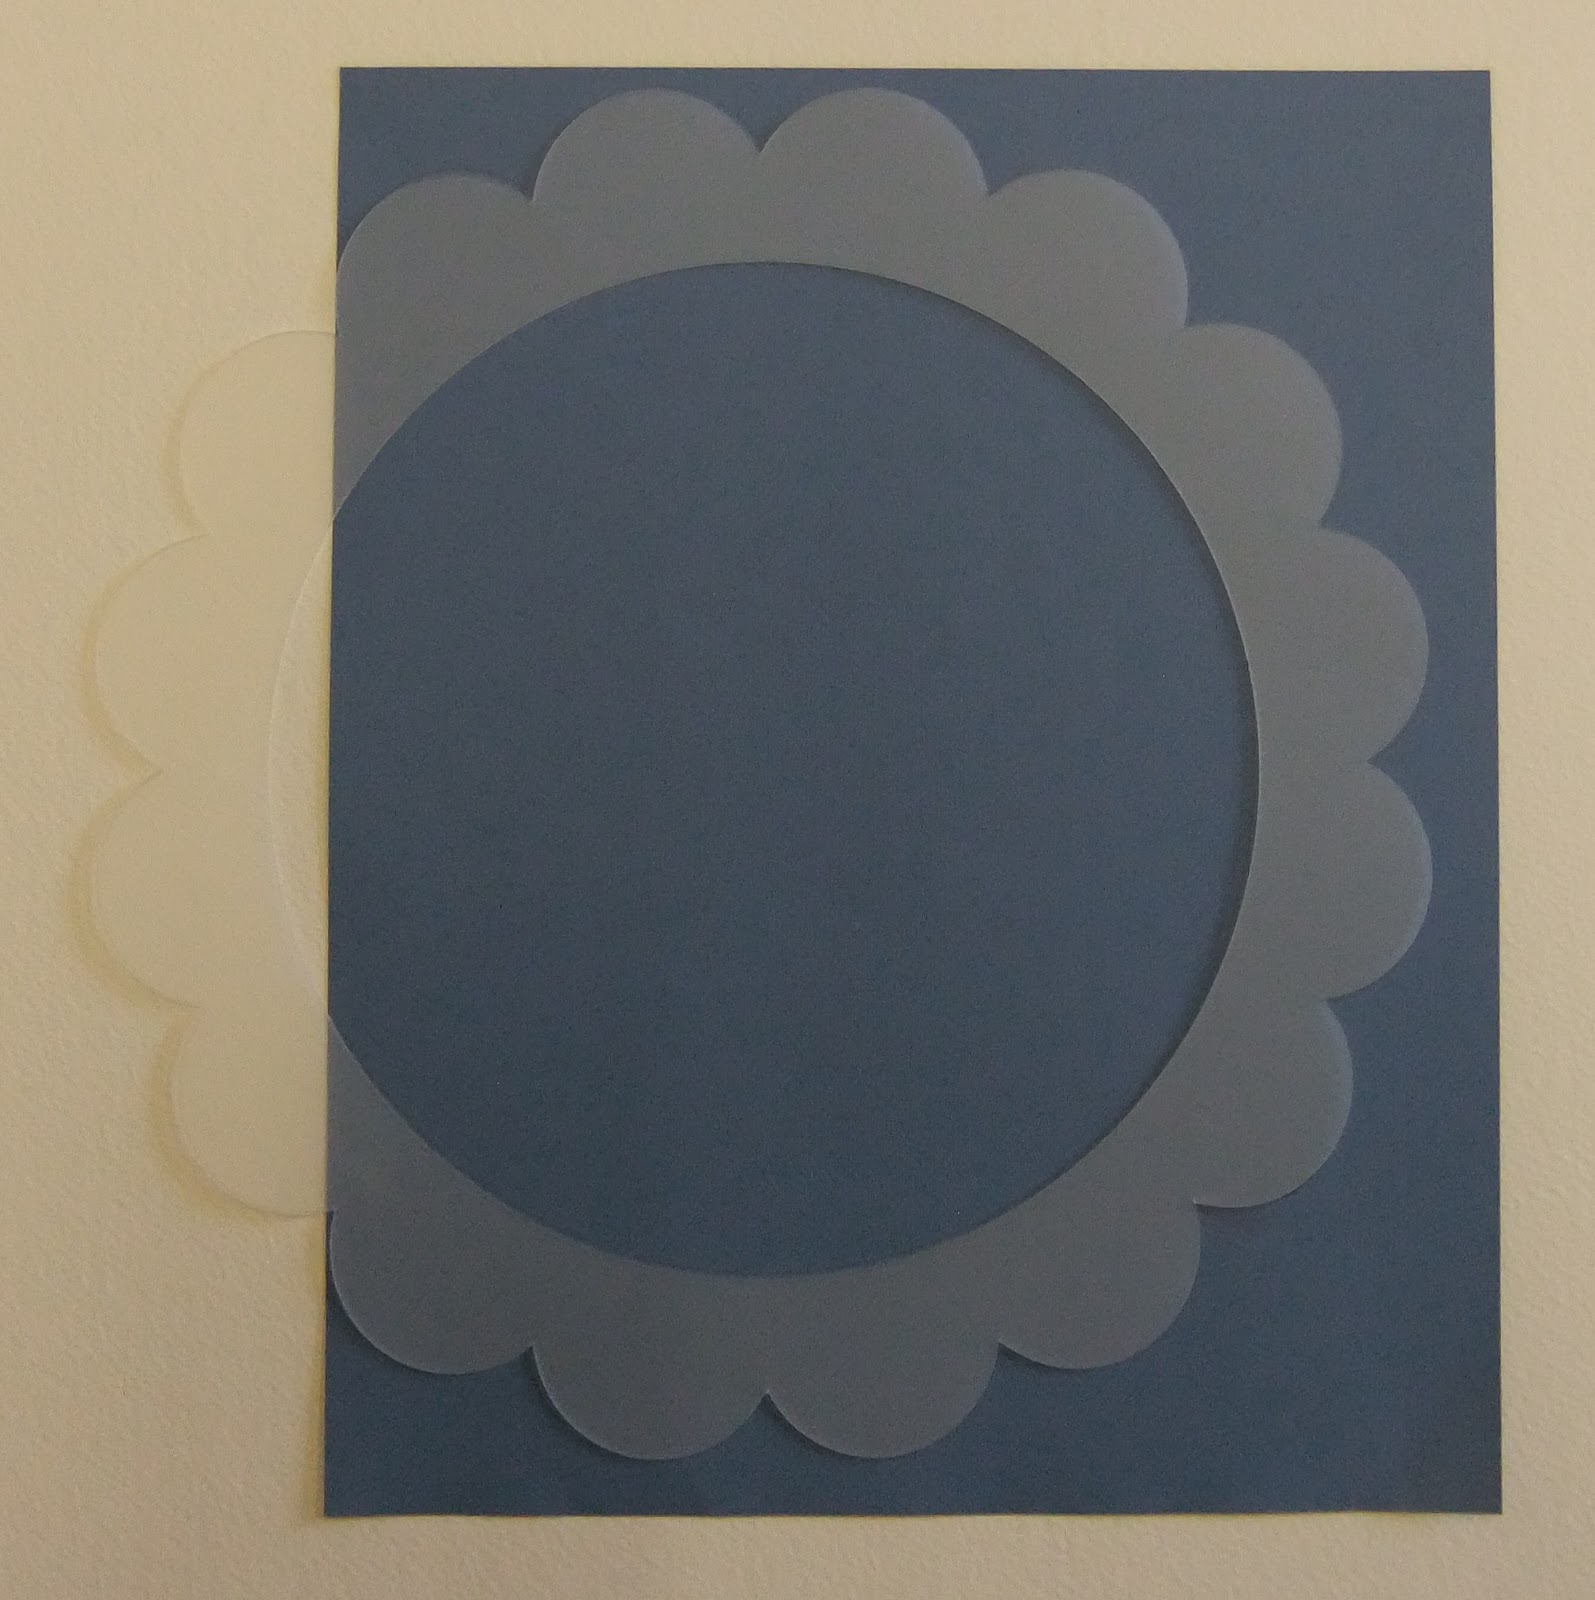
Use the scalloped circle template to draw a scalloped circle (less 4 scallops) onto the blue paper. If you have the kit this has been done for you. Cut out along the scalloped line.
On the piece of rubber, draw out the pattern that you would like to turn into a stamp to decorate the centre circle. Use a knife to cut away the areas that are not required, trying to cut the areas in a v-shape. Straight line designs are easiest to cut and remember that the design will look much better when it is finished - persevere!
Stamp the cream card with your stamp in a checkerboard pattern. If you find this hard to do by eye you can use a ruler and pencil to divide the card up into 1 inch squares. I used dark brown ink.
Now stamp the image again, between the brown designs, this time I used blue ink.
Cut your design into a circle, if you have the kit, this has been marked for you.
Cut out a larger circle from tan card and layer the 2 circles together. If you have the kit, this circle has been marked for you.
Stick the 2 circles to the blue scalloped circle, one edge will overhang at the moment.
Stick the circle arrangement to the 12x12 and cut off the excess that hangs over the edge.
Use the brown paint and the pointed end of the stick provided to dab tiny dots of paint around the scalloped edge of the blue paper.
Use the blunt end of the stick to add large dabs of paint around the stamped circle. If you find that your dots are a bit patchy, use a little more paint.
When the brown dots are dry, add a dot of white paint between the brown dots, I used a large embossing tool to create this medium-sized dot.
Top tip: Every so often, wipe the end of the embossing tool with a piece of kitchen roll as the paint will start to dry on the tip and create uneven dots.
Draw a title onto the dark brown pieces of card and use an embossing tool to dot over your pencil lines with white paint. Keep your dots as close together as possible without them touching. If the dots are too far apart, the letters will not be clear.
Use the biscuit-coloured card to create a border around your photos, mount on the page and you're finished1 I have used one 4x6 photo but a couple of smaller ones would work well too. Having the photo overlapping the dotted circle into the scallops adds interest to the page.